
[Next.js] 생활코딩 Next.js
0. Next.js란 무엇인가?
- 리액트는 클라이언트 사이트 렌더링 -> js 동작하지 않거나 다운받을 수 없는 환경에선 화면에 표시되지 않는 문제
- Next.js는 서버 사이드 렌더링 지원
- 서버쪽에서 js가 실행됨, 완성된 HTML을 브라우저에게 전송하기 때문에 js를 실행할 수 없는 환경에서도 잘 동작 -> 검색 친화적
- 다운로드 받는 즉시 실행
1. 설치와 실행
① node.js 설치
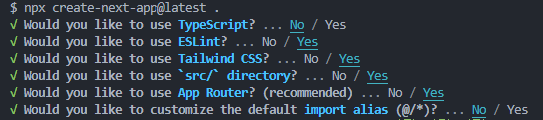
② npx create-next-app@latest . // latest는 최신 버전 설치한다는 의미
③ npm run dev로 실행
2. 샘플 앱 세탁
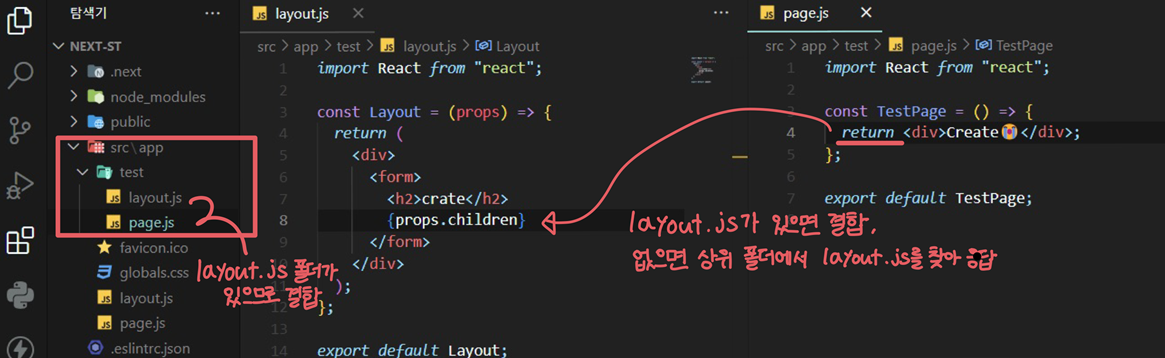
- layout.js이 골격 구성
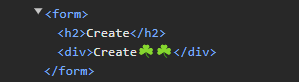
<body>{children}</body>에서 children의 정체? -> page.js의 리턴 값
page.js의 리턴 값이 layout.js로 들어가는 것은 그 페이지가 해당 레이아웃을 사용하겠다는 것을 의미
// app > layout.js
import "./globals.css";

export const metadata = {
  title: "Create Next App",
  description: "Generated by create next app",
};

export default function RootLayout({ children }) {
  return (
    <html>
      <body>{children}</body>
    </html>
  );
}
// app > page.js
export default function Home() {
  return <div>(❁´◡`❁)</div>;
}

3. 배포
배포 어떻게하지?
npm run build로 배포판 만들고,npm run start로 배포판 실행
4. 뼈대 만들기
- app > page.js가 리턴하는 값이 컨텐트
- 공통된 레이아웃 다루기 : layout.js 활용
- 타이틀 처리하는 방법 : metadata를 export
// app > layout.js
import "./globals.css";
export const metadata = {
title: "Web tutorials",
description: "Generated by sieun",
};
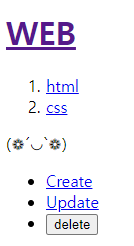
export default function RootLayout({ children }) {
return (
<html>
<body>
<h1>
<a href="/">WEB</a>
</h1>
<ol>
<li>
<a href="/read/1">html</a>
</li>
<li>
<a href="/read/2">css</a>
</li>
</ol>
{children}
<ul>
<li>
<a href="/create">Create</a>
</li>
<li>
<a href="/update/1">Update</a>
</li>
<li>
<input type="button" value="delete"></input>
</li>
</ul>
</body>
</html>
);
}
5. 라우팅
라우팅이란? 경로에 따라 어떤 컨텐츠를 어떤 방식으로 보여줄 것인가를 결정하는 것
① app 밑에 폴더(ex: create) > page.js 파일 생성 후 컴포넌트 만들기
② next.js는 app 폴더 밑 create 폴더를 찾고, 그 폴더가 page.js 파일을 갖고 있는지 확인
③ page.js의 리턴 값은 layout.js의 children에 결합해 만들어진 최종적인 html응답
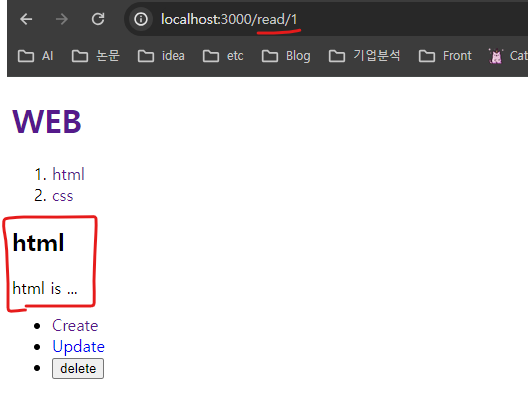
④ 그럼 http://localhost:3000/read/1,http://localhost:3000/read/2와 같은 경로 설정은 어떻게해? -> 다이나믹 라우팅 사용
다이나믹 라우팅 예시
- app > read 폴더 생성
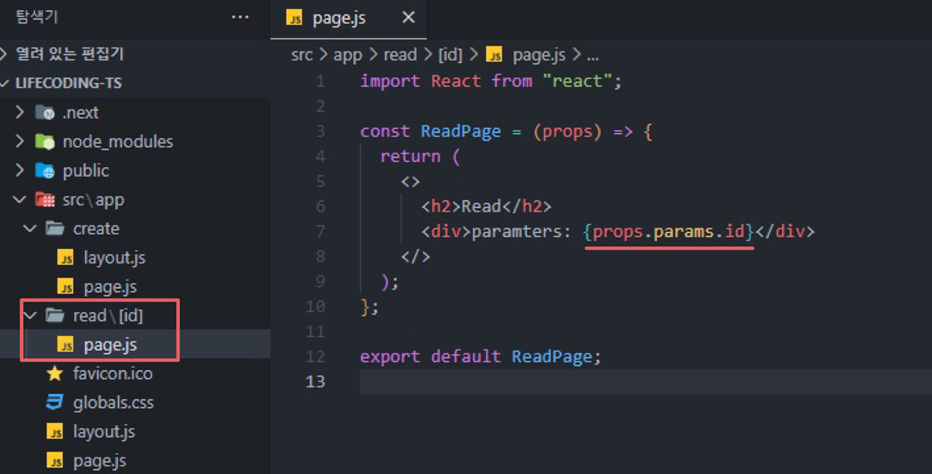
- 그 후 app > read > [id] 생성 후 아래다가 page.js 생성
- 이제
localhost3000/read/1,localhost3000/read/2등 접근 가능
경로 어떻게 사용하는데?
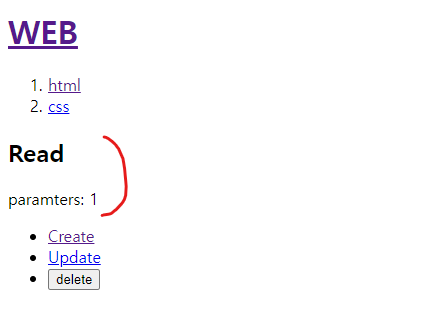
app > read > [id] > page.js에 props를 주고 {props.params.id}로 가져올 수 있다.
6. single page application
single page application?
- 웹 페이지가 여러 개의 웹페이지임에도 불구하고 마치 한 페이지처럼 동작하는 애플리케이션을 싱글페이지 애플리케이션이라고 한다.
- a태그를 Link로 바꾸는 것 만으로도 single page application 구현 가능
서버사이드 렌더링?
- js가 꺼져도 서버사이트 렌더링은 next폴더에 next.js가 서버쪽에서 리액트를 실행해서 응답 결과를 next에 저장해서 그것을 응답
- next.js는 js가 아닌 html을 응답하기 때문에 js 꺼져도 됨 -> 검색엔진 최적화 유리
a vs Link?
- Link 컴포넌트는 링크에다가 마우스 올려놓으면 백그라운드에서 미리 페이지를 다운로드 받음(발자 모드 NetWork 탭에서 확인해보기)
- 방문했던 페이지 다시 방문하려고 하면 아예 서버랑 통신 x -> 빠름
- a태그 쓰지 말자
// add > layout.js
import Link from "next/link";
import "./globals.css";

export const metadata = {
  title: "Web tutorials",
  description: "Generated by sieun",
};

export default function RootLayout({ children }) {
  return (
    <html>
      <body>
        <h1>
          <Link href="/">WEB</Link>
        </h1>
        <ol>
          <li>
            <Link href="/read/1">html</Link>
          </li>
          <li>
            <Link href="/read/2">css</Link>
          </li>
        </ol>
        {children}
        <ul>
          <li>
            <Link href="/create">Create</Link>
          </li>
          <li>
            <Link href="/update/1">Update</Link>
          </li>
          <li>
            <input type="button" value="delete"></input>
          </li>
        </ul>
      </body>
    </html>
  );
}
7. 정적 자원 사용하기
next.js에서 이미지와 같은 정적인 컨텐츠 어떻게 사용?
-> pubulic 폴더에 이미지를 위치시키면 됨
이 파일 어떻게 읽어옴?
-
page.js에서 img 태그를 쓰고 src로 경로 설정
export default function Home() {
  return (
    <div>
      (❁´◡`❁)
      <img src="/dog.png"></img>
    </div>
  );
}
8. css
- src 바로 하위에 있는 layout.js는 root layout이기 때문에 어떤 페이지를 방문하건 간에 global.css 파일이 로드됨
- 즉, 전역적으로 디자인 적용 가능
9. backend
① json 서버 설치
npx json-server@0.17.4 --port 9999 --watch db.json
–watch는 파일 정보가 바뀌면 바로 서버에 반영하기 위한 옵션임
② 그 후, 생성된 db.json을 용도에 맞게 수정하기 -> 그 경로 들어가면 파일이 있는 내용을 json 형태로 응답
topics로 들어가면 글 목록을 보여주고 싶으면 아래와 같이 db.json 수정
{
  "topics": [
    {
      "id": 1,
      "title": "html",
      "body": "html is ..."
    },
    {
      "id": 2,
      "title": "css",
      "body": "css is ..."
    }
  ],
  "posts": [
    {
      "id": 1,
      "title": "json-server",
      "author": "typicode"
    }
  ],
  "comments": [
    {
      "id": 1,
      "body": "some comment",
      "postId": 1
    }
  ],
  "profile": {
    "name": "typicode"
  }
}
그럼 data를 js 파일로 어떻게 가져오는데?
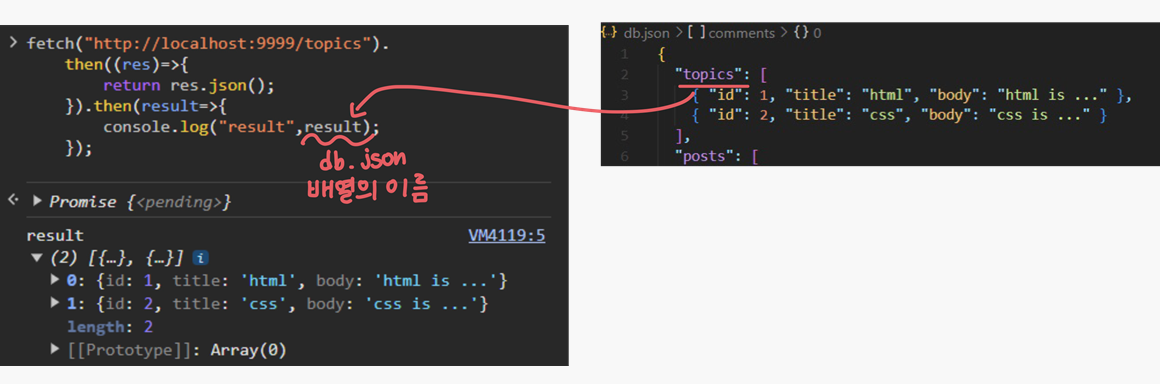
브라우저 console 창에서 서버와 통신할 때 사용하는 fetch 명렁어로 데이터를 가져올 수 있음
fetch().then().then() <- 이게 기본 형태
fetch("http://localhost:9999/topics")
  .then((res) => {
    return res.json();
  })
  .then((result) => {
    console.log("result", result);
  });
10. 글 목록 가져오기
next.js(React 18에 존재하는 개념)엔 Server Component와 Client Component라는 개념이 존재
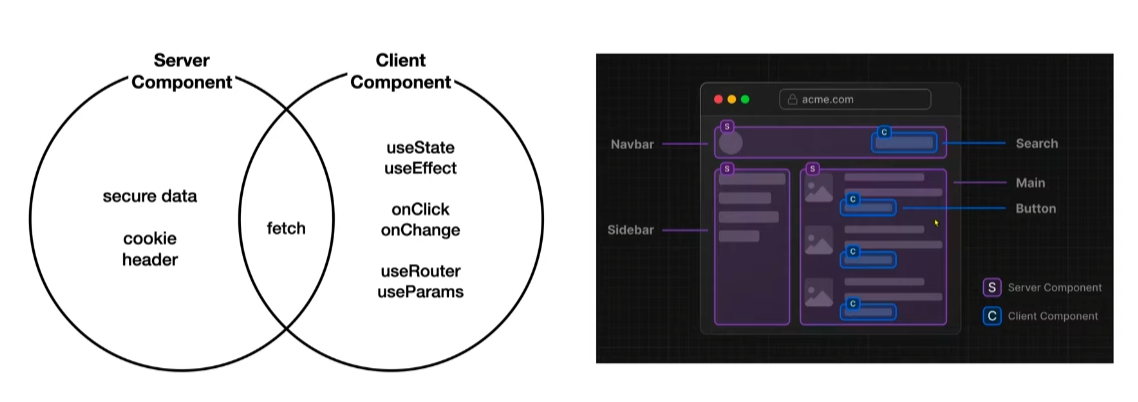
- 컴포넌트 분리가 중요함 → 사용자와 상호작용하는 컴포넌트만 클라이언트 컴포넌트로, 단순히 서버 정보를 보여주는 역할을 하는 것은 서버 컴포넌트로 만들기
// app > layout.js

import Link from "next/link";
import "./globals.css";
import { useEffect, useState } from "react";

export const metadata = {
  title: "Web tutorials",
  description: "Generated by sieun",
};

export default function RootLayout({ children }) {
  const [topics, setTopics] = useState([]);
  useEffect(() => {
    fetch("http://localhost:9999/topics")
      .then((res) => res.json())
      .then((result) => {
        setTopics(result);
      });
  }, []);
  return (
    <html>
      <body>... 생략</body>
    </html>
  );
}
- 하지만 위 코드 오류 발생 -> useEffect와 useState는 클라이언트 컴포넌트에서만 동작하기 때문
- ⭐next.js는 기본적으로 서버 컴포넌트라고 간주함
클라이언트 컴포넌트로 변경하기 위해 상단에
"use client";작성
- 또 오류 발생 -> matadata는 서버 컴포넌트에서만 작동하기 때문
- 따라서 컴포넌트 분리가 필요함 -> 서버 컴포넌트는 한 번 렌더링 되면 클라이언트에게 보내주는 역할만 하면 됨
코드를 아래와 같이 변경
// 변경 전
"use client";

const [topics, setTopics] = useState([]);
useEffect(() => {
  fetch("http://localhost:9999/topics")
    .then((res) => res.json())
    .then((result) => {
      setTopics(result);
    });
}, []);
// 변경 후
const res = await fetch("http://localhost:9999/topics");
const topics = await res.json();
- 서버 측에서 데이터를 가져오고 클라이언트에 전달하는 방식으로 변경
11. 글 읽기
사용자와 상호작용 하지 않는 컴포넌트 -> 서버컴포넌트로 만들기
// app > read > [id] > page.js
import React from "react";

const ReadPage = async (props) => {
  const res = await fetch(`http://localhost:9999/topics/${props.params.id}`);
  const topic = await res.json();
  return (
    <>
      <h2>{topic.title}</h2>
      <div> {topic.body}</div>
    </>
  );
};

export default ReadPage;
12. 글 생성
// app > create > page.js
"use client";
import React from "react";

const CratePage = () => {
  return (
    <form
      onSubmit={(e) => {
        e.preventDefault();
        const title = e.target.title.value;
        const body = e.target.body.value;
        // 서버에서 데이터 전송해 추가하려고 하는 거기 때문에 옵션 값 필요함
        const options = {
          method: "POST",
          headers: {
            "Content-Type": "application/json",
          },
          body: JSON.stringify({ title, body }),
        };
        fetch("http://localhost:9999/topics", options)
          .then((res) => res.json())
          .then((result) => {
            console.log(result);
          });
      }}
    >
      <p>
        <input type="text" name="title" placeholder="title" />
      </p>
      <p>
        <textarea name="body" placeholder="body" />
      </p>
      <p>
        <input type="submit" value="create" />
      </p>
    </form>
  );
};

export default CratePage;
그럼 사용자가 보고 있는 페이지를 방금 생성한 id에 해당하는 글로 이동하게 하고 싶으면 어떻게함?
client 컴포넌트에서만 사용할 수 있는 useRouter 사용하면 됨
"use client";
import React from "react";
import { useRouter } from "next/navigation"; // import (주의: navigation에서 import)

const CratePage = () => {
  const router = useRouter(); // useRouter 사용
  return (
    <form
      onSubmit={(e) => {
        e.preventDefault();
        const title = e.target.title.value;
        const body = e.target.body.value;
        const options = {
          method: "POST",
          headers: {
            "Content-Type": "application/json",
          },
          body: JSON.stringify({ title, body }),
        };
        fetch("http://localhost:9999/topics", options)
          .then((res) => res.json())
          .then((result) => {
            console.log(result);
            const lastid = result.id; //id값 받기
            router.push(`/read/${lastid}`); // 방금 생성한 글로 리디렉션
          });
      }}
    >
      <p>
        <input type="text" name="title" placeholder="title" />
      </p>
      <p>
        <textarea name="body" placeholder="body"></textarea>
      </p>
      <p>
        <input type="submit" value="create" />
      </p>
    </form>
  );
};

export default CratePage;
그런데 위 코드 문제가 있음 -> 생성한 글 목록이 갱신이 안됨
13. cache
생성한 글 목록이 갱신이 안되는 문제 -> cache와 관련 있음
- 해결 방안 : fetch로 데이터를 가져온 후 cache로 만들지 않으면 됨(성능 희생 -> 추후 다른 방법 공부하기)
- fetch 할 때 ` { next: { revalidate: 10 } }`를 옵션으로 주자
- 10초 동안만 chach를 유지하겠다는 뜻
cache를 만들지 않기 위해 revalidate를 0으로 변경
` { cache: “no-store” }` 옵션 써도 됨 캐시를 저장하지 않는다는 뜻
// app > layout.js
export default async function RootLayout({ children }) {
  const res = await fetch("http://localhost:9999/topics", {
    cache: "no-store",
  });
Next.js의 라우팅 API인 refresh를 사용하여 현재 페이지를 다시 로드하여 새로고침
// app > crate > page.js
fetch("http://localhost:9999/topics", options)
  .then((res) => res.json())
  .then((result) => {
    console.log(result);
    const lastid = result.id;
    router.push(`/read/${lastid}`);
    router.refresh(); //
  });
14. 필요할 때 update, delete 기능 보이기
글을 선택했을 때만 update, delete 기능이 표시되도록 개선을 해보자
링크에 id가 있는지 체크해야함

- [id] 밖에 위치한 root layout은 어떻게 id 알아내지? -> useParams 사용(useParams를 사용해야 하는데 useParams는 client component hook)
- root layout은 서버 컴포넌트로 이루어져 있는데 어떻게함? -> app/Control.js 생성해서 별도의 파일로 분리
// app > Control.js
"use client";
import Link from "next/link";
import { useParams } from "next/navigation";
import React from "react";

const Control = () => {
  const params = useParams();
  const id = params.id;
  return (
    <ul>
      <li>
        <Link href="/create">Create</Link>
      </li>
      {id ? (
        <>
          <li>
            <Link href={`/update/${id}`}>Update</Link>
          </li>
          <li>
            <input type="button" value="delete"></input>
          </li>
        </>
      ) : null}
    </ul>
  );
};

export default Control;
Control 컴포넌트를 app/layout.js에서 사용
// app > layout.js
import Link from "next/link";
import "./globals.css";
import Control from "./Control";

export const metadata = {
  title: "Web tutorials",
  description: "Generated by sieun",
};

export default async function RootLayout({ children }) {
  const res = await fetch("http://localhost:9999/topics", {
    cache: "no-store",
  });
  const topics = await res.json();
  return (
    <html>
      <body>
        <h1>
          <Link href="/">WEB</Link>
        </h1>
        <ol>
          {topics.map((topic) => {
            return (
              <li key={topic.id}>
                <Link href={`/read/${topic.id}`}>{topic.title}</Link>
              </li>
            );
          })}
        </ol>
        {children}
        <Control />
      </body>
    </html>
  );
}
이제 home 화면에선 안보이고 글을 선택했을 때만 update, delete 표시
15. 글 수정
src > update > [id] > page.js 생성
수정 기능은 read + create 기능을 합친 것과 같음.
- crate 폴더의 page.js 코드 우선 그대로 적용
- update는 클라이언트 컴포넌트이고 read는 서버 컴포넌트인데 어떻게함? -> 새로 코드 작성해야지.. 재활용 불가
// src > update > [id] > page.js
"use client";
import React, { useEffect } from "react";
import { useParams, useRouter } from "next/navigation";

const UpdatePage = () => {
  const router = useRouter();
  const params = useParams();
  const id = params.id;
  useEffect(() => {
    fetch(`http://localhost:9999/topics/${id}`)
      .then((res) => res.json())
      .then((result) => console.log(result));
  }, []);

  return (
    <form
      onSubmit={(e) => {
        e.preventDefault();
        const title = e.target.title.value;
        const body = e.target.body.value;
        const options = {
          method: "POST",
          headers: {
            "Content-Type": "application/json",
          },
          body: JSON.stringify({ title, body }),
        };
        fetch("http://localhost:9999/topics", options)
          .then((res) => res.json())
          .then((result) => {
            console.log(result);
            const lastid = result.id;
            router.push(`/read/${lastid}`);
            router.refresh();
          });
      }}
    >
      <p>
        <input type="text" name="title" placeholder="title" />
      </p>
      <p>
        <textarea name="body" placeholder="body"></textarea>
      </p>
      <p>
        <input type="submit" value="create" />
      </p>
    </form>
  );
};

export default UpdatePage;
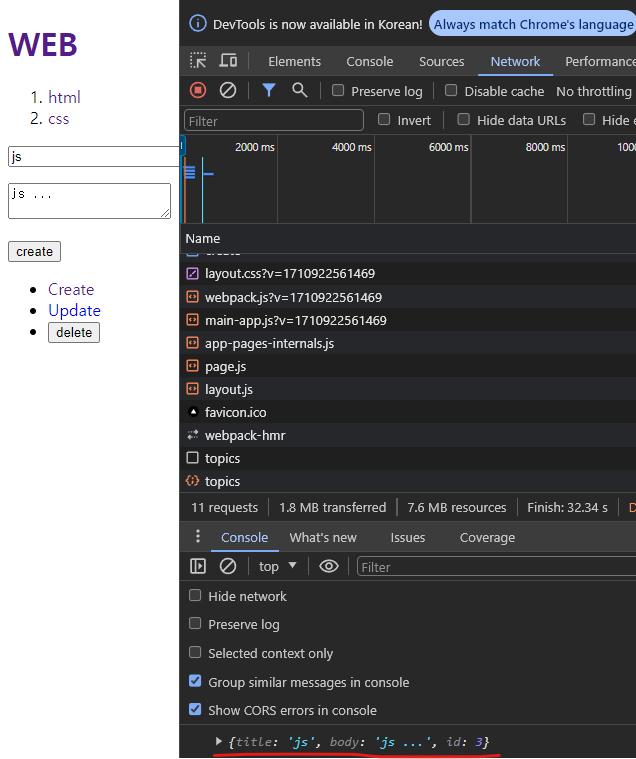
http://localhost:3000/update/3에 들어가면 console창에 아래와 같이 뜸

서버에서 가져온 값으로 세팅하기 위해 state 생성
"use client";
import React, { useEffect, useState } from "react";
import { useParams, useRouter } from "next/navigation";

const UpdatePage = () => {
  const [title, setTitle] = useState("");
  const [body, setBody] = useState("");

  const router = useRouter();
  const params = useParams();
  const id = params.id;
  useEffect(() => {
    fetch(`http://localhost:9999/topics/${id}`)
      .then((res) => res.json())
      .then((result) => {
        setTitle(result.title);
        setBody(result.body);
      });
  }, []);

  return (
    <form
      onSubmit={(e) => {
        e.preventDefault();
        const title = e.target.title.value;
        const body = e.target.body.value;
        const options = {
          method: "PATCH",
          headers: {
            "Content-Type": "application/json",
          },
          body: JSON.stringify({ title, body }),
        };
        fetch(`http://localhost:9999/topics/${id}`, options)
          .then((res) => res.json())
          .then((result) => {
            console.log(result);
            const lastid = result.id;
            router.push(`/read/${lastid}`);
            router.refresh();
          });
      }}
    >
      <p>
        <input
          type="text"
          name="title"
          placeholder="title"
          value={title}
          onChange={(e) => setTitle(e.target.value)}
        />
      </p>
      <p>
        <textarea
          name="body"
          placeholder="body"
          value={body}
          onChange={(e) => setBody(e.target.value)}
        ></textarea>
      </p>
      <p>
        <input type="submit" value="update" />
      </p>
    </form>
  );
};

export default UpdatePage;
본문은 수정이 안됨 -> cache 때문임
아래와 같이 수정
// app > read > [id] > page.js
import React from "react";

const ReadPage = async (props) => {
  const res = await fetch(`http://localhost:9999/topics/${props.params.id}`, {
    cache: "no-store",
  });
  const topic = await res.json();
  return (
    <>
      <h2>{topic.title}</h2>
      <div> {topic.body}</div>
    </>
  );
};

export default ReadPage;
16. 글 삭제
app/Control.js 수정
"use client";
import Link from "next/link";
import { useParams, useRouter } from "next/navigation";
import React from "react";

const Control = () => {
  const params = useParams();
  const router = useRouter();
  const id = params.id;
  return (
    <ul>
      <li>
        <Link href="/create">Create</Link>
      </li>
      {id ? (
        <>
          <li>
            <Link href={`/update/${id}`}>Update</Link>
          </li>
          <li>
            <input
              type="button"
              value="delete"
              onClick={() => {
                const options = { method: "DELETE" };
                fetch(`http://localhost:9999/topics/${id}`, options)
                  .then((res) => res.json())
                  .then((result) => {
                    // 삭제하면 root로 리다이렉션
                    router.push("/");
                    router.refresh();
                  });
              }}
            ></input>
          </li>
        </>
      ) : null}
    </ul>
  );
};

export default Control;
17. 환경변수 & 졸업👩🎓
api 주소가
http://localhost:9999/topics이렇게 localhost로 하드코딩되어있음 -> 관리해야함
.env.local파일을 root 경로에 만들고 중요한 정보를 담자.NEXT_PUBLIC접두사가 없으면 server component에서만 사용할 수 있고, client component에서는 사용할 수 없음 -> DB_PASSWORD와 같은 비밀정보를 보호하기 위한 안전장치- 웹 브라우저를 위한 환경변수를 쓰고싶다면
NEXT_PUBLIC을 접두사로 붙여야 함.
NEXT_PUBLIC_API_URL=http://localhost:9999/
아래와 같이 변경
const resp = await fetch(`${process.env.NEXT_PUBLIC_API_URL}topics/${id}`, {
반영이 안되면 서버 껐다 키면 됨
tip) 협업을 위해 .env.local.example 파일을 만들자.
- 협업 할 때 다른 개발자들이 프로젝트에서 사용되는 환경 변수를 쉽게 확인할 수 있음(샘플로써의 역할)
댓글남기기