[Next.js] Next.js에서 Swiper Library 사용하기
1. Swipe 라이브러리 설치
yarn add swiper
2. Swiper 컴포넌트 구현
2.1 Swiper와 SwiperSlide
Swiper에서 슬라이더를 구현할 때 핵심적인 역할을 하는 두 가지 컴포넌트가 있다.
- Swiper: 슬라이더 컨테이너 역할을 한다.
- SwiperSlide: 각 슬라이드의 내용을 나타낸다.
💡 Swiper는 다양한 설정을 props로 전달받아 동작하며, 원하는 스타일이나 기능을 쉽게 적용할 수 있다.
2.2 Swiper 기본 사용법
swiper 공식 데모 문서 에서 원하는 슬라이더를 선택한 후, 해당 슬라이더에 필요한 모듈과 스타일을 가져와 사용하면 된다.
Swiper의 기본적인 애니메이션과 스타일을 적용하려면 반드시 관련 CSS 파일을 함께 import해야 한다.
// Import Swiper React components
import { Swiper, SwiperSlide } from "swiper/react";

// Import Swiper styles
import "swiper/css";

const Carousel = () => {
  return (
    <Swiper spaceBetween={50} slidesPerView={3}>
      <SwiperSlide>Slide 1</SwiperSlide>
      <SwiperSlide>Slide 2</SwiperSlide>
      <SwiperSlide>Slide 3</SwiperSlide>
      <SwiperSlide>Slide 4</SwiperSlide>
      ...
    </Swiper>
  );
};

export default Carousel;
2.2 Swipter 구현하기
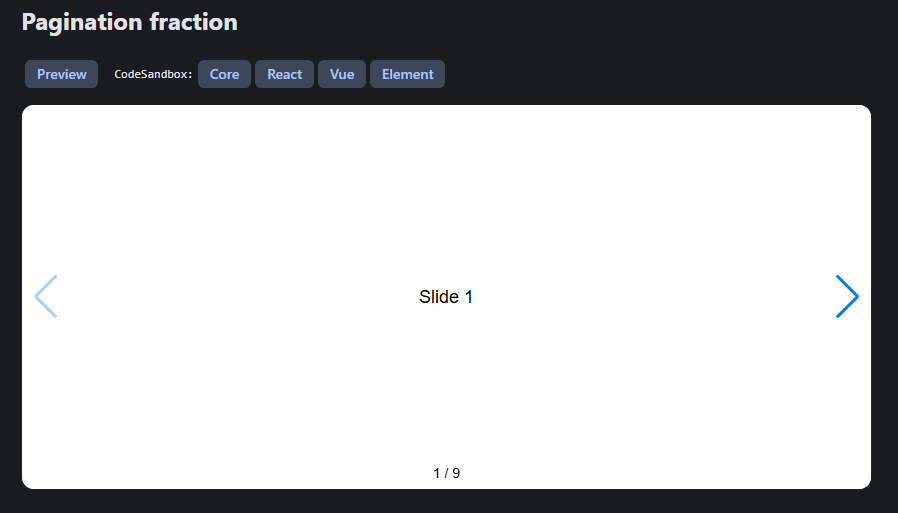
아래와 같은 스타일의 Swiper를 구현해보자.

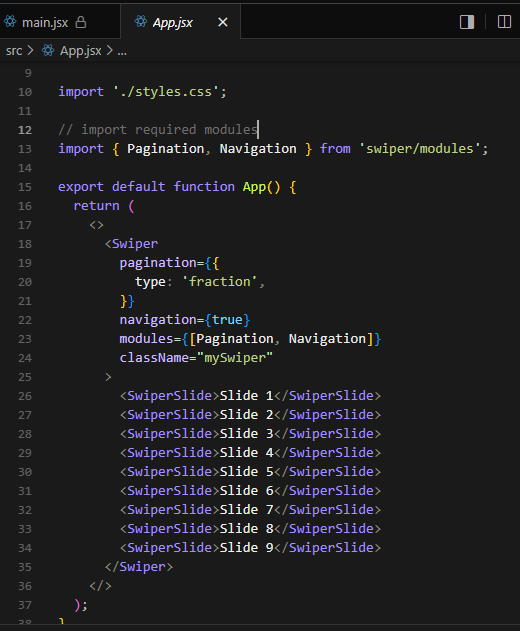
swiper 공식 데모 문서 에서 React 버튼을 클릭하고 나오는 코드를 복사하여 사용하면 된다.

// Import Swiper React components
import { Swiper, SwiperSlide } from "swiper/react";

// Import Swiper styles
import "swiper/css";
import "swiper/css/pagination";
import "swiper/css/navigation";

// import required modules
import { Pagination, Navigation, Autoplay } from "swiper/modules";

const Carousel = () => {
  return (
    <Swiper
      pagination={{
        type: "fraction",
      }}
      navigation={true}
      modules={[Pagination, Navigation, Autoplay]}
      className="mySwiper"
      autoplay={{
        delay: 3000,
        disableOnInteraction: false,
      }}
      speed={1000}
    >
      <SwiperSlide>Slide 1</SwiperSlide>
      <SwiperSlide>Slide 2</SwiperSlide>
      <SwiperSlide>Slide 3</SwiperSlide>
      <SwiperSlide>Slide 4</SwiperSlide>
    </Swiper>
  );
};

export default Carousel;
2.3 Swiper의 주요 옵션
| 옵션 | 설명 | 사용 예시 |
|---|---|---|
| slidesPerView | 한 슬라이드에 보여줄 개수 (‘auto’로 설정 시 자동 조정) | slidesPerView={3} |
| spaceBetween | 슬라이드 간 간격 (px 단위) | spaceBetween={30} |
| loop | 무한 반복 여부 (true 시 무한 루프 가능) | loop={true} |
| autoplay | 자동 슬라이드 설정 | autoplay= |
| direction | 슬라이드 방향 (‘horizontal’ 또는 ‘vertical’) | direction="vertical" |
| slideToClickedSlide | 슬라이드 클릭 시 해당 슬라이드로 이동 | slideToClickedSlide={true} |
| centeredSlides | 슬라이드를 가운데로 정렬 | centeredSlides={true} |
| allowTouchMove | 스와이프 여부 (false 시 버튼으로만 조작 가능) | allowTouchMove={false} |
| watchOverflow | 슬라이드가 하나일 때 네비게이션 버튼 및 페이지네이션 숨김 여부 설정 | watchOverflow={true} |
| navigation | 이전/다음 버튼 활성화 여부 (true로 설정 시 버튼 활성화) | navigation={true} |
| pagination | 페이지네이션 활성화 여부 및 스타일 설정 (e.g., type: ‘fraction’, clickable: true) | pagination= |
옵션 사용 예시
import { Swiper, SwiperSlide } from "swiper/react";
import "swiper/css";
import "swiper/css/pagination";
import "swiper/css/navigation";
import { Pagination, Navigation, Autoplay } from "swiper/modules";

const Carousel = () => {
  return (
    <Swiper
      slidesPerView={3}
      spaceBetween={30}
      loop={true}
      autoplay={{
        delay: 3000,
        disableOnInteraction: false,
      }}
      speed={1000}
      direction="horizontal"
      slideToClickedSlide={true}
      centeredSlides={true}
      allowTouchMove={true}
      watchOverflow={true}
      navigation={true}
      pagination={{ type: "fraction", clickable: true }}
      modules={[Pagination, Navigation, Autoplay]}
    >
      <SwiperSlide>Slide 1</SwiperSlide>
      <SwiperSlide>Slide 2</SwiperSlide>
      <SwiperSlide>Slide 3</SwiperSlide>
      <SwiperSlide>Slide 4</SwiperSlide>
    </Swiper>
  );
};

export default Carousel;
3. CSS로 스타일링
3.1 Tailwind 미사용
/* components/carousel/carousel.css */
.swiper-button-next,
.swiper-button-prev {
  background-color: #fff;
  opacity: 0.6;
  height: 50px;
  width: 50px;
  border-radius: 50px;
  color: black !important;
}
.swiper-button-next:hover,
.swiper-button-prev:hover {
  @apply bg-gray-300;
}

.swiper-button-prev:after,
.swiper-button-next:after {
  font-size: 1.1rem !important;
  font-weight: 600 !important;
}
3.2 Tailwind 사용
/* components/carousel/carousel.css */
.swiper-button-next,
.swiper-button-prev {
  @apply bg-white opacity-60 h-12 w-12 rounded-full text-black flex items-center justify-center;
}

.swiper-button-next:hover,
.swiper-button-prev:hover {
  @apply bg-gray-300;
}

.swiper-button-prev:after,
.swiper-button-next:after {
  @apply text-lg font-semibold; /* 아이콘 크기와 두께 */
}

댓글남기기