[Next.js] Next.js React-Query 사용하기
1. React Query 기본 설정
1.1 app/providers.tsx 생성
기본적으로
layout.tsx는 서버 컴포넌트로 동작한다. 따라서 클라이언트 전용 컴포넌트인provider를 루트 레이아웃에서 직접 사용할 수 없다.
따라서 app/providers.tsx에 provider을 use client지시어를 사용하여 클라이언트 컴포넌트로 만들어 서버 컴포넌트인 layout.tsx에 주입하여야 한다.
// app/providers.tsx
"use client"; // 클라이언트 컴포넌트로 지정

import { QueryClient, QueryClientProvider } from "@tanstack/react-query";

// 클라이언트 컴포넌트로 React Query Provider 정의

const Providers = ({ children }: { children: React.ReactNode }) => {
  const queryClient = new QueryClient();

  return (
    <QueryClientProvider client={queryClient}>{children}</QueryClientProvider>
  );
};

export default Providers;
provider추가시 아래와 같이 확장할 수 있다.
// app/providers.tsx
"use client"; // 클라이언트 컴포넌트로 지정

import { QueryClient, QueryClientProvider } from "@tanstack/react-query";
import { ReactQueryDevtools } from "@tanstack/react-query-devtools";
import { SessionProvider } from "next-auth/react";

const Providers = ({ children }: { children: React.ReactNode }) => {
  const queryClient = new QueryClient();

  return (
    <SessionProvider>
      <QueryClientProvider client={queryClient}>
        {children} <ReactQueryDevtools initialIsOpen={false} />
      </QueryClientProvider>
    </SessionProvider>
  );
};

export default Providers;
1.2 DevTools 활용
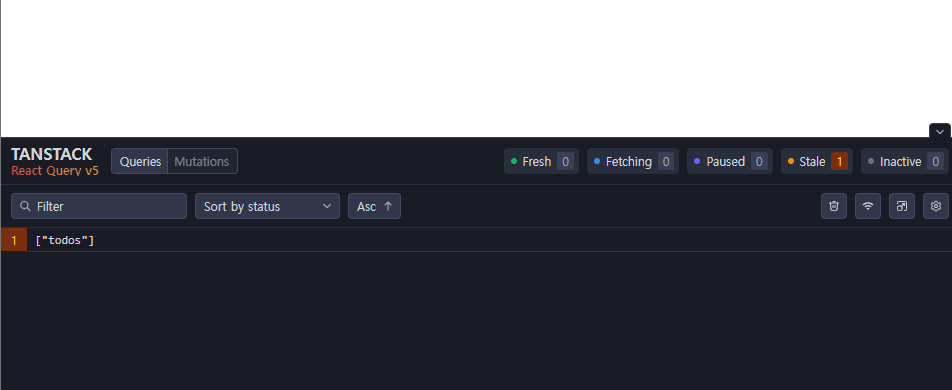
React Query DevTools를 사용하면 쿼리 상태, 캐시 상태 및 네트워크 요청을 시각적으로 확인할 수 있다.
설치
yarn add @tanstack/react-query-devtools
DevTools 사용 예제
// app/providers.tsx
"use client";

import { QueryClient, QueryClientProvider } from "@tanstack/react-query";
import { ReactQueryDevtools } from "@tanstack/react-query-devtools";

const Providers = ({ children }: { children: React.ReactNode }) => {
  const queryClient = new QueryClient();

  return (
    <QueryClientProvider client={queryClient}>
      {children} <ReactQueryDevtools initialIsOpen={false} />
    </QueryClientProvider>
  );
};

export default Providers;

1.3 layout.tsx에서 Provider 주입
이제 생성한
providers를root layout에 주입하여 하위 컴포넌트에서 React Query를 사용할 수 있도록 하자.
import type { Metadata } from "next";
import "./globals.css";
import Providers from "./providers";

export const metadata: Metadata = {
  title: "Create Next App",
  description: "Generated by create next app",
};

export default function RootLayout({
  children,
}: Readonly<{
  children: React.ReactNode;
}>) {
  return (
    <html lang="en">
      <body>
        {/* 클라이언트 컴포넌트인 ReactQueryProvider로 감싸줌 */}
        <Providers>{children}</Providers>
      </body>
    </html>
  );
}
2. React Query 사용하기
제대로 QueryClientProvider가 주입되었는지 확인해보자!
2.1 JSON Server 설치 및 데이터 설정
먼저 json-server을 설치하자
yarn global add json-server
그 후,
db.json파일을 만들어 아래와 같은 내용을 넣어주자. 이 json 파일을 db로 사용한다.
{
  "posts": [
    { "id": "1", "title": "타이틀1", "content": "내용1" },
    { "id": "2", "title": "타이틀2", "content": "내용2" }
  ]
}
아래 명령어를 통해
json-server을 실행하자.
json-server --watch db.json --port 4000
참고 (json-server 사용 시)
package.json 파일에 스크립트를 추가하여 JSON 서버를 간편하게 실행할 수 있다. 다음과 같은 내용을 package.json 파일의 scripts 섹션에 추가해 보자.
"scripts": {
  "serve": "json-server --watch db.json --port 4000"
}
이제 터미널에서 yarn serve 명령어를 입력하면, json-server가 db.json 파일을 감시(–watch)하고 4000번 포트에서 서버를 시작한다.
2.2 axios 설치
yarn add axios
2.3 useQuery 사용
use client 지시어는 useQuery와 useMutation을 사용할 때 필요하다.
"use client";

import { useQuery } from "@tanstack/react-query";
import axios from "axios";
import React from "react";

// 인터페이스 정의
interface Post {
  id: string;
  title: string;
  content: string;
}

// 서버로부터 게시글 데이터를 가져오는 함수
export const fetchPosts = async () => {
  try {
    const response = await axios.get("http://localhost:4000/posts");
    return response.data;
  } catch (error) {
    console.error(error);
  }
};

// 게시글 목록을 보여주는 컴포넌트
const PostBasic = () => {
  // React Query의 `useQuery` 훅으로 데이터 가져오기
  const {
    data: posts, // 서버에서 가져온 데이터를 data라는 이름으로 반환, data를 posts로 이름 변경
    isLoading,
    isError,
  } = useQuery({
    queryKey: ["posts"], // 쿼리키로 데이터 고유하게 식별하고 캐시
    queryFn: fetchPosts, // 데이터를 가져오는 비동기 함수
  });

  if (isLoading) {
    return <p>로딩중...</p>;
  }

  if (isError) {
    return <p>에러 발생!</p>;
  }

  // 데이터가 성공적으로 로드되었을 때 게시글 목록을 렌더링
  return (
    <main>
      {posts.map((post: Post) => (
        <ul key={post.id}>
          <li>{post.title}</li>
          <li>{post.content}</li>
        </ul>
      ))}
    </main>
  );
};

export default PostBasic;
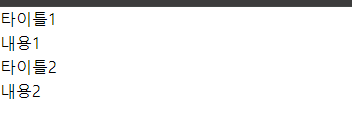
위 코드를 적용한 후, 페이지를 로드하면 아래와 같이 정상적으로 데이터가 표시된다.

3. 효율적으로 React Query 사용하기
위에서 설계한 코드를 [React Query 효율적 구조 설계에 대한 고찰↗️] 포스팅을 참고하여 리팩토링을 해보자.
3.1 파일 구조
React Query와 관련된 기능을 모듈화하여 관리하기 쉽게 나누었다.
📂 components
└───📂 hooks
    └───📂 query
        ├───📄 keys.constant.ts      # 쿼리 키 상수를 정의한 파일
        ├───📄 usePostsQuery.ts      # 포스트 목록을 가져오는 쿼리 훅
        └───📄 usePostsMutation.ts   # 포스트 추가 및 삭제를 처리하는 뮤테이션 훅
📂 types
└───📂 post-types.ts               # 포스트 관련 타입 정의
📂 api
└───📂 posts.ts                   # 포스트 관련 API 호출 함수
3.2 쿼리 키 상수로 관리하기
React Query에서 데이터를 패칭할 때 queryKey를 사용하여 각 데이터를 식별한다. 하지만 문자열로 직접 사용하다 보면 오타로 인한 오류가 발생할 수 있다.
따라서, 쿼리 키를 상수화하여 관리하는 것이 좋다.
// app/components/hooks/query/keys.constant.ts
export const QUERY_KEYS = {
  POSTS: "posts",
  USERS: "users",
};
3.3 .env.local 설정
개발 환경에서만 사용되는 환경 변수를 설정하기 위해
.env.local파일을 설정하였다.
NEXT_PUBLIC_SERVER_URL=http://localhost:4000
3.4 types 폴더 생성
app/types/post-types.ts
// app/types/post-types.ts
export interface Post {
  id: string;
  title: string;
  content: string;
}
3.5 API 요청
API 요청을 별도 파일에
// app/api/posts.ts

import axios from "axios";
import { Post } from "../types/post-types";

const postsAxios = axios.create({
  baseURL: process.env.NEXT_PUBLIC_SERVER_URL,
});

// posts 조회
export const fetchPosts = async () => {
  const response = await postsAxios.get("/posts");
  return response.data;
};

// posts 작성
export const addPost = async (data: Post) => {
  const response = await postsAxios.post("/posts", data);
  return response.data;
};

// posts 삭제
export const deletePost = async (id: string) => {
  const response = await postsAxios.delete(`/posts/${id}`);
  return response.data;
};

// posts 수정
export const editPost = async (id: string, data: Post) => {
  const response = await postsAxios.patch(`/posts/${id}`, data);
  return response.data;
};
3.6 useQuery 커스텀 훅
useQuery 커스텀 훅 생성
React Query를 사용하여 useQuery로 데이터를 가져오는 로직을 반복하게 되면, 코드가 중복되고 유지보수가 어려워진다.
아래처럼 커스텀 훅을 활용하여 데이터 패칭 로직을 컴포넌트에서 분리하면, 컴포넌트는 데이터 로딩 상태와 에러만 관리할 수 있다.
// app/components/hooks/query/usePostsQuery.ts

"use client";

import { useQuery } from "@tanstack/react-query";
import { QUERY_KEYS } from "./key.constant";
import { fetchPosts } from "@/app/api/posts";

export const usePostsQuery = () =>
  useQuery({
    queryKey: [QUERY_KEYS.POSTS],
    queryFn: fetchPosts, // 데이터를 가져오는 비동기 함수
  });
useQuery 커스텀 훅 사용
이제 컴포넌트에서 간단하게 useQuery 커스텀 훅을 호출하여 데이터를 가져올 수 있다.
"use client";

import { usePostsQuery } from "../components/hooks/query/usePostsQuery";
import { Post } from "../types/post-types";

// 게시글 목록을 보여주는 컴포넌트
const PostBasic = () => {
  const { data: posts = [], isLoading, isError } = usePostsQuery(); // 커스텀 훅 호출

  if (isLoading) {
    return <p>로딩중...</p>;
  }

  if (isError) {
    return <p>에러 발생!</p>;
  }

  return (
    <main>
      {posts.map((post: Post) => (
        <ul key={post.id}>
          <li>{post.title}</li>
          <li>{post.content}</li>
        </ul>
      ))}
    </main>
  );
};

export default PostBasic;
3.7 useMutation 커스텀 훅
useMutation 커스텀 훅 생성
useQuery와 마찬가지로, 커스텀 훅을 통해 useMutation의 로직을 캡슐화하여 컴포넌트에서 쉽게 사용할 수 있도록 하자.
"use client";

import { useMutation, useQueryClient } from "@tanstack/react-query";
import { addPost, deletePost } from "@/app/api/posts";
import { QUERY_KEYS } from "./key.constant";

export const useAddPostMutation = () => {
  const queryClient = useQueryClient();

  return useMutation({
    mutationFn: addPost,
    onSuccess: () => {
      queryClient.invalidateQueries({ queryKey: [QUERY_KEYS.POSTS] });
      alert("추가 완료!");
    },
    onError: (error) => {
      console.error("추가 실패:", error);
      alert("추가 실패. 다시 시도해 주세요.");
    },
  });
};

export const useDeletePostMutation = () => {
  const queryClient = useQueryClient();

  return useMutation({
    mutationFn: deletePost,
    onSuccess: () => {
      queryClient.invalidateQueries({ queryKey: [QUERY_KEYS.POSTS] });
      alert("삭제 완료!");
    },
    onError: (error) => {
      console.error("삭제 실패:", error);
      alert("삭제 실패. 다시 시도해 주세요.");
    },
  });
};
useMutation 커스텀 훅 사용
"use client";

import { useDeletePostMutation } from "../components/hooks/query/usePostsMutation";
import { usePostsQuery } from "../components/hooks/query/usePostsQuery";
import { Post } from "../types/post-types";

// 게시글 목록을 보여주는 컴포넌트
const PostBasic = () => {
  const { data: posts = [], isLoading, isError } = usePostsQuery(); // 커스텀 훅 호출

  // 삭제를 위한 뮤테이션 훅
  const deletePostMutation = useDeletePostMutation();

  const handleDeletePost = (id: string) => {
    deletePostMutation.mutate(id); // Post 삭제
  };

  if (isLoading) {
    return <p>로딩중...</p>;
  }

  if (isError) {
    return <p>에러 발생!</p>;
  }

  return (
    <section>
      {posts.map((post: Post) => (
        <ul key={post.id}>
          <li>제목: {post.title}</li>
          <li>내용: {post.content}</li>
          <button onClick={() => handleDeletePost(post.id)}>삭제하기</button>
        </ul>
      ))}
    </section>
  );
};

export default PostBasic;
4. 부록 - React Query 사용시 고려할 사항⭐
아래 포스팅을 참고하여 React Query를 보다 더 구조적이고 효율적으로 사용할 수 있다.

댓글남기기